
G503 WWII 1943 Willys MB Jeep Frame Front Horn rail repair and replacement
This article shows how to replace front frame horns from damage or garbage steel additions


|
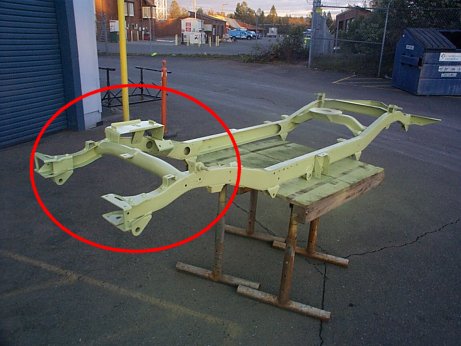
1. Many jeep projects have frames with damage or extra garbage steel from being modified in the past. |
|
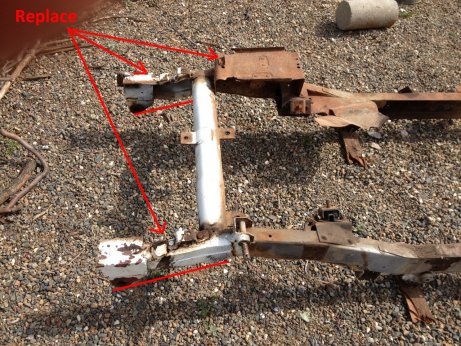
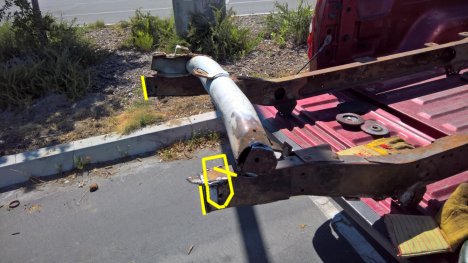
2. Here is a typical front horn section that is damaged and have a bunch of garbage steel. With this frame, the frame horns have a bunch of extra steal added, and the battery holder is all rusted out. |
|
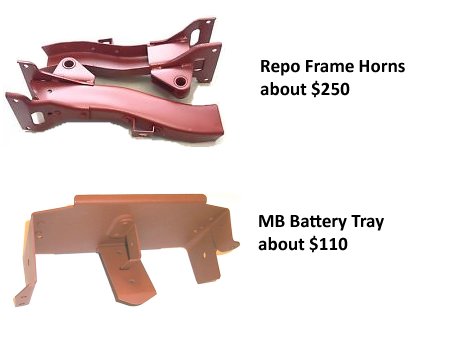
3. Some of the repo parts used here are the frame front horns from MD Juan, and a repo MB battery tray (many vendors have) |
|
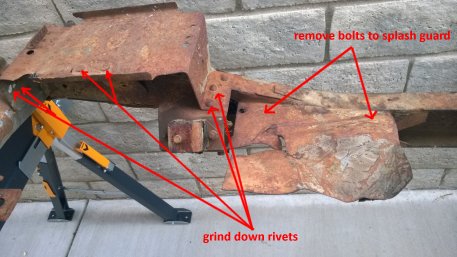
4. We start by removing the Battery tray. Unlike the GPW battery tray you have to remove rivets on front and back of tray, there are two 1/2 in bolts holding on the splash guard, remove this as well. |
|
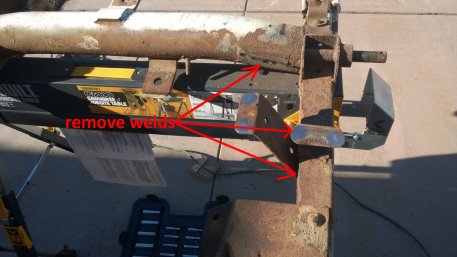
5. With the top of the battery tray off, you can get to the legs that are welded on. you need to remove the welds to remove these battery tray supports. |
|
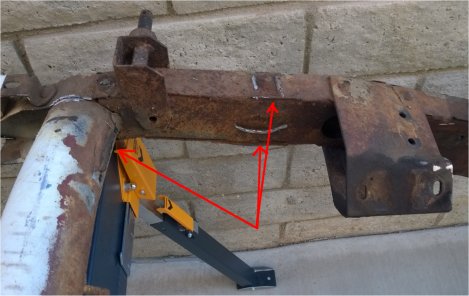
6. As you can see, the supports that were welded to frame and crossmember are removed. Once the front frame horns are spot welded back on, then will re-weld the repo battery tray back on. |
|
7. Next few tasks are getting the garbage steel off the frame, and to find the original frame to be able to tack back on the frame. Flipping the frame over and looking at the driverside horn, map out where you need to cut the excess steel, keeping as much of the original frame as possible. |
|
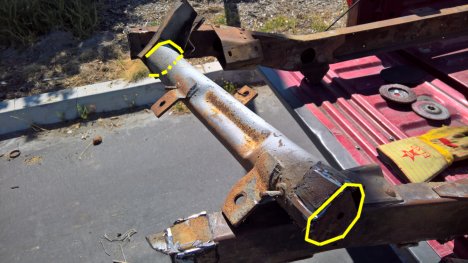
8. Flipping the frame back over again, and looking at the passenger side, the excess steel was cut off, and here you see more garbage steel still needs to be removed. The Crossmember is welded in as well, and you will want to remove this in order to square up the new horns and crossmember. |
|
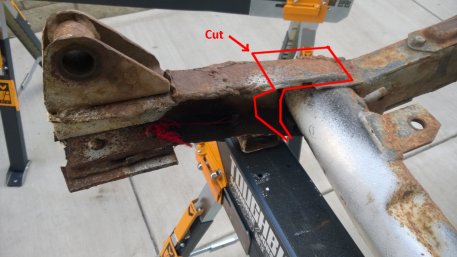
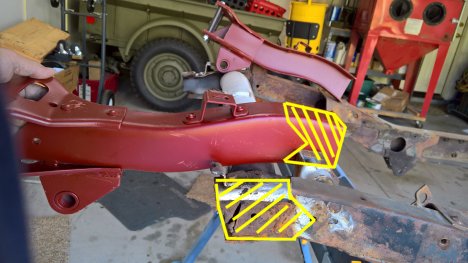
9. After reviewing the potential cut area, and the fact that the shock mounts were bent up, I decided that I need to cut further back on the frame. The Frame horns still reach this area and the cut is a little easier with a cutting wheel and grinder. |
|
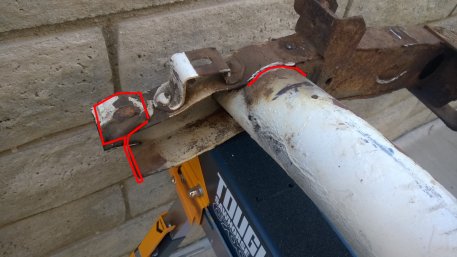
10. You see here, that I had to clean off the excess steel around the cross member. The other side you can see all the excess steel added by someone in previous attempt to strengthen area. NOTE: this is a really time consuming project to try and salvage a highly modified frame. So be patient! |
|
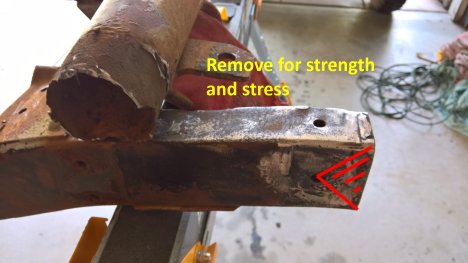
11. Now, you need to plan correctly how you will get the NEW front horn on and with maximum strength. If you just make a straight cut, and have a lot of stress, it can crack. Here you see where I am planning on cutting and will match with the new horn to the pattern. |
|
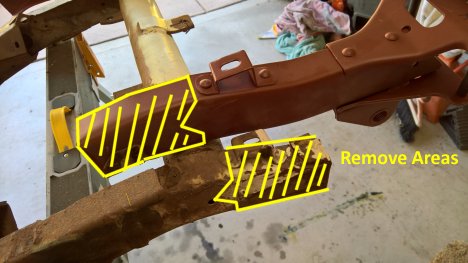
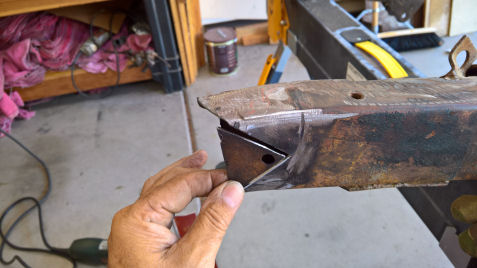
12. Here you see a little better plan between the frame and the new horn. I will match this up perfectly to the proper spacing position on frame, then I will cut out the pattern for the new horn. I will cut that out on the new horn and then position on the frame and tack weld for testing the spring. |
|
13. |
|
14. |
|
15. |

|
16. |

|
17. |

|
18. |

|
19. |

|
20. |

|
21. |

|
22. |

|
23. |

|
24. |

|
25. |
